Hey Everyone,
I've been MIA for a while and that's because I gave birth to my first child in Septe mber. I had to step away from the blog because I didn't have the time nor energy to go into the kitchen and make something. Now that my daughter Amina is sort of settling into a routine, I thought I would try and come back to the blog.
Another thing to note that I'm transferring the blog to WordPress. The new address of the blog is: http://potofthoughtss.wordpress.com/ . The recipes from this blog have already been transferred and new ones will show up in due time. And if you want to stay in touch via Facebook, you can like the page: https://www.facebook.com/pages/A-Pot-of-Thoughts-Recipes-and-Random-Thoughts/199617363426496
Take care!
Hinna
December 19, 2012

September 4, 2012
Quite disgusting!!!
L-cysteine. Ever seen this on an ingredient list? Don't have a clue what it is? Well let me tell you. L-cysteine is an amino acid that is sourced from duck feathers, human hair or hog hair! I'm sure now you understand the title for this post.
For more information on L-cysteine, check out The Vegetarian Resource Group Blog.
For more information on L-cysteine, check out The Vegetarian Resource Group Blog.
August 16, 2012
Food Packaging for Eid
Eid is just around the corner and if you're like me, your Eid gifts are ready to go. However, if you've struggled to get yourself organized this year, have you thought of baking gifts for people? There are some really creative ways to wrap up Eid gifts. Here are some generic and/or party specific food packaging that can be adapted to reflect the Eid Holiday.


Feeling really bad, but making up for it with this post!
I feel really bad that I didn't spend some time working on the blog during Ramadan. I really wanted to post a few recipes that could work in a pinch, but instead, I resorted to taking you to posts from last year. In my defense, I was spending a lot of my time reflecting and increasing my knowledge of my religion.
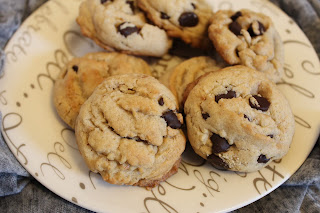
 To help ease my guilt, I'm going to pass along a delicious chewy, chocolate chip cookie recipe that is to die for! I'm not lying or exaggerating when I say these are really good cookies. I've made these cookies twice already and you'd be surprised at how fast they were gobbled up. Last night I took a tray of 40 cookies to SeekersHub because it was the 27th night of Ramadan and the Hub had an extended night program. I was afraid that the 40 cookies wouldn't get consumed by the night's end. BOY, was I ever wrong! The cookies were finished within 15 minutes of my arrival- the vast majority were consumed by adults of the male specimen! hehe...I think only a handful of kids got to try a cookie. Note to self, next time make a double batch to take to the Hub!
The original recipe for these cookies comes from Lil' Luna's blog. The picture of the cookies with a glass of milk was tantalizing enough for me to try out the recipe. After looking it over, I decided to try and cut out some of the sugar in the recipe. I don't know about you, but I think 2 cups of sugar in a cookie recipe is a bit much. I also tweaked the flour component of the recipe. This recipe is very adaptable- you can make them double chocolate chip cookies by adding cocoa powder, throw in nuts or butterscotch chips...
 3/4 cup brown sugar (original recipe calls for 1 cup)
3/4 cup white granulated sugar (original recipe calls for 1 cup)
1/2 cup butter, softened at room temperature, or if you're in a pinch, microwave for 10 seconds
1/2 cup canola oil
2 eggs
1 tsp baking soda
1 tsp baking powder
1 tsp salt
1 tsp vanilla bean paste (original recipe calls for vanilla extract)
3 cups flour (what I did was use two cups of white flour, then for the third cup, fill the measuring cup with 4 TBSP whole wheat flour and then fill the rest of the cup with white flour)
1 cup semi-sweet chocolate chips (original recipe calls for milk chocolate chips)
Preheat oven to 350 degrees.
Take two cookie sheets and line them with parchment paper and set aside.
In a large bowl, cream together butter, oil and sugars. Add eggs and beat until fluffy. Add vanilla bean paste.
In a separate bowl, mix together baking soda, baking powder, salt and flour.
Add flour mixture to wet mixture and mix until combined- don't over beat the batter.
Stir in chocolate chips.
Using a 1 1/2" ice cream/cookie scoop, scoop out cookie dough onto parchment-lined cookie sheets. Bake one sheet at a time for 7 minutes. Remove cookie sheet and place cookies onto a cooling rack. In between baking, place cookie sheets in freezer to cool them down. If you put the cookie dough on hot cookie sheets, the cookies will spread out too much.
 To help ease my guilt, I'm going to pass along a delicious chewy, chocolate chip cookie recipe that is to die for! I'm not lying or exaggerating when I say these are really good cookies. I've made these cookies twice already and you'd be surprised at how fast they were gobbled up. Last night I took a tray of 40 cookies to SeekersHub because it was the 27th night of Ramadan and the Hub had an extended night program. I was afraid that the 40 cookies wouldn't get consumed by the night's end. BOY, was I ever wrong! The cookies were finished within 15 minutes of my arrival- the vast majority were consumed by adults of the male specimen! hehe...I think only a handful of kids got to try a cookie. Note to self, next time make a double batch to take to the Hub!
The original recipe for these cookies comes from Lil' Luna's blog. The picture of the cookies with a glass of milk was tantalizing enough for me to try out the recipe. After looking it over, I decided to try and cut out some of the sugar in the recipe. I don't know about you, but I think 2 cups of sugar in a cookie recipe is a bit much. I also tweaked the flour component of the recipe. This recipe is very adaptable- you can make them double chocolate chip cookies by adding cocoa powder, throw in nuts or butterscotch chips...
Chewy Chocolate Chip Cookies ( a crowd favourite!)

3/4 cup white granulated sugar (original recipe calls for 1 cup)
1/2 cup butter, softened at room temperature, or if you're in a pinch, microwave for 10 seconds
1/2 cup canola oil
2 eggs
1 tsp baking soda
1 tsp baking powder
1 tsp salt
1 tsp vanilla bean paste (original recipe calls for vanilla extract)
3 cups flour (what I did was use two cups of white flour, then for the third cup, fill the measuring cup with 4 TBSP whole wheat flour and then fill the rest of the cup with white flour)
1 cup semi-sweet chocolate chips (original recipe calls for milk chocolate chips)
Preheat oven to 350 degrees.
Take two cookie sheets and line them with parchment paper and set aside.
In a large bowl, cream together butter, oil and sugars. Add eggs and beat until fluffy. Add vanilla bean paste.
In a separate bowl, mix together baking soda, baking powder, salt and flour.
Add flour mixture to wet mixture and mix until combined- don't over beat the batter.
Stir in chocolate chips.
Using a 1 1/2" ice cream/cookie scoop, scoop out cookie dough onto parchment-lined cookie sheets. Bake one sheet at a time for 7 minutes. Remove cookie sheet and place cookies onto a cooling rack. In between baking, place cookie sheets in freezer to cool them down. If you put the cookie dough on hot cookie sheets, the cookies will spread out too much.
August 2, 2012
Fruit Salad Switch-Up
I looked at the calendar today and was surprised, no shocked to see that it's already August 2nd!! How can this be? I could have sworn that summer just started and Ramadan was right around the corner! Now, we're into the last few weeks of summer vacation and it's almost the middle of Ramadan. Darn, time is flying by! Got to make most of the time left!!Ramadan Reminder: try to give a little charity every day this month.
Okay, back to the Ramadan post. Fruit salad/chaat is synonymous with the South Asian iftar table. It shows up in a variety of ways- with masala (which I personally don't like very much), without masala (love!), with tropical fruit, without tropical fruit, with bananas, without bananas...the possibilities are endless!
I decided to shake up the typical iftar fruit bowl and make fruit skewers with fresh Ontario strawberries, sweet pineapple chunks and mouth-watering cantaloupe. The skewers allows the fruit to shine in all of their healthy goodness and brightens up the iftar table. You can serve the skewers with honey flavoured greek yogurt or eat them as is.
 |
| The single skewer of baby strawberries is for my 4 year old niece :o) |
July 28, 2012
Bananaberry Muffins and Spiritual Reflections
“Be sure we shall test you with something of fear and hunger, some loss in goods, lives and the fruits (of your toil) but give glad tidings to those who patiently persevere. Those who, when misfortune strikes them, say: ‘Indeed we belong to Allah and to Him is our return. Those are the ones upon whom are blessings and mercy from their Lord and it is those who are rightly guided.” [Qur'an 1:155]
The Prophet (peace be upon him) said: "When Allah desires good for someone, He tries him with hardships." [Sahîh al-Bukhârî]
These last few months for me have been tough emotionally and spiritually. I found myself enveloped in a darkness that brought me down to an all-time low. As the verse from the Holy Qur'an states above, God will test us in our lives and we must patiently persevere for "Allah does not burden a soul beyond that it can bear.." [Qur'an 2:288]. Keeping this in mind, I have been putting myself through a cleanse- not a detox cleanse of my body (although I would like to do that one of these days), but a spiritual cleanse whereby my life, behaviour, attitude, personality, heart, and soul come into alignment with Allah swt and the teachings of Prophet Muhammed (peace and blessings be upon him). This spiritual cleanse has not been easy and is far from over...I feel as though I have only just scratched the surface. All I can do is continue on this path of realignment with patience and gratitude that God put me through this test and be thankful for all that God has given me.
(Please note that I use God and Allah interchangeably because they mean the same thing- Allah is the Arabic word for God.)
_________________________________________________
Bananaberry Muffins - these are great for Sehri/Suhoor
(Recipe adapted from Janet and Greta)

1 cup quick-cooking rolled oats (not instant)
1/2 cup all-purpose flour
1/2 cup whole wheat flour
1/2 cup white sugar
1/4 cup wheat bran (original recipe calls for ground flaxseed or wheat germ)
1 1/2 tsp baking powder
1 tsp baking soda
1/2 tsp salt
4-5 small ripe bananas, mashed
1/4 cup butter, melted
1 large egg
1 cup fresh or frozen blueberries, washed and drained of water
Preheat oven to 375 degrees. Line a 12-cup muffin tin with paper liners or spray muffin tin with oil and set aside.

In another bowl, whisk together bananas, butter and egg. Fold in banana mixture into dry ingredients until dry ingredients are moistened. Gently fold in blueberries.
Evenly divide batter into muffin tin using a large spoon or ice cream scoop. Bake for 15-20 minutes or until a toothpick inserted in the centre comes out clean.
Remove muffins from tin and cool on wire rack.
July 26, 2012
Tea for two...or three...or four..
O God, I seek Your forgiveness for every sin that remained with me because, when an anxiety struck, I sought aid, succor and support from someone besides You.Salaam (Peace) everyone!
I hope your Ramadan fasts are going well. The hours are long and the days are hot and humid, but God-Willing, your struggles will be accepted by God.
I'm bring back another blast from the past to help you quench your thirst after you break your fast. This cold tea is guaranteed to cool you down and give you a bit of caffeine to prepare for the night prayer. Let's drink to Refreshing Mint Tea .
July 22, 2012
Ramadan from the Past: Puff Pastry Post
Salam (Peace)!
It is the second (or third) day of Ramadan, the Muslim month of fasting. Thankfully, I have been able to spend time reflecting, listening to Qur'an, lectures and attending Taraweeh, the special night prayers that take place during the month of Ramadan.
I haven't had an opportunity to post the recipe on breakfast/sehri/suhoor muffins, so I'll take you back a year and have you visit my post on stuffed puff pastry. I hope you enjoy making these for your family!
Ramadan Blessings to you and your family!
It is the second (or third) day of Ramadan, the Muslim month of fasting. Thankfully, I have been able to spend time reflecting, listening to Qur'an, lectures and attending Taraweeh, the special night prayers that take place during the month of Ramadan.
I haven't had an opportunity to post the recipe on breakfast/sehri/suhoor muffins, so I'll take you back a year and have you visit my post on stuffed puff pastry. I hope you enjoy making these for your family!
Ramadan Blessings to you and your family!
July 16, 2012
Ramadan 2012

It's hard to believe that Ramadan is starting this weekend, Insh'Allah! This year I'm going to try and post a few recipes to help you with your Ramadan cooking. I promise they will be simple and will not take up too much of your time.
To help get you started in your spiritual preparation for Ramadan, let's go back into the past and visit a post on Ramadan and it's significance.
July 2, 2012
My Favourite Banana Bread
 Lately I have been buying up bananas and eating one a day. Sometimes I buy so many that I can't finish them before they get to that icky brown, over ripe stage. You know that stage- where they're too gross to eat on their own, but are perfect for a cake, muffin or bread recipe.
I have eaten my share of banana bread over the years, but have never come across one that I really enjoyed. Well that changed when I decided to try this recipe from allrecipes.com It's a VERY easy recipe to follow and I'm pretty sure you already have most, if not all, the ingredients in your kitchen.
My Favourite Banana Bread

2 cups all-purpose flour
1 tsp baking soda
1/4 tsp salt
1/2 cup butter
3/4 cup brown sugar
2 eggs, beaten,
5 medium size bananas, overripe and mashed
6 Hershey kisses, cut in half (my addition)
Preheat oven to 350 degrees. Lightly grease a loaf pan and set aside.
In a bowl, combine flour, baking soda and salt. In another bowl, cream together butter and brown sugar. Beat in eggs and mashed bananas until well blended, about 3-4 minutes. Stir wet mixture into flour mixture until just combined. Gently stir in Hershey kisses. Pour batter into prepared pan.
Bake in oven for 60 minutes or until a toothpick inserted in the centre of cake comes out clean. Remove pan from oven and let sit for 10 minutes. Invert bread onto a cooling rack.
May 14, 2012
Ghirardelli Classic Brownies
I've been sitting on this recipe for a while, since December. I finally have a moment today to post it.

Preheat oven to 350 degrees F. Butter an 8"x8" pan (as you can see, I did not use an 8x8 pan. I listed the pan size written on the instructions for you guys!) and coat it with cocoa powder. Set aside.

In a double boiler, melt chocolate bar and butter over low heat, stirring until smooth. Remove from heat; cool to room temperature. Stir in brown sugar and vanilla. Add eggs, mix well. In bowl, sift together flour, baking powder and salt. Slowly fold in flour mixture; mix well. Stir in chips and walnut pieces.
 Pour batter into pan and sprinkle walnut pieces on top of batter. Bake for 25-30 minutes, or until a tester comes out clean.
Ghirardelli Classic Brownies

4oz Ghirardelli Semi-Sweet Chocolate Baking Bar (1 bar)
1 cup brown sugar, packed
2 large eggs
1/4 tsp baking powder
1/2 tsp salt
1 stick unsalted butter, cut into small cubes
1 tsp pure vanilla extract or vanilla bean paste
3/4 cup and 2 tbsp all purpose flour
1/3 cup Ghirardelli Semi-Sweet Chips
1/4 cup walnut pieces, plus more for sprinkling on top of brownies (my edition, so it's optional)
1 Tbsp cocoa powder (my edition, so it's optional)
Preheat oven to 350 degrees F. Butter an 8"x8" pan (as you can see, I did not use an 8x8 pan. I listed the pan size written on the instructions for you guys!) and coat it with cocoa powder. Set aside.

In a double boiler, melt chocolate bar and butter over low heat, stirring until smooth. Remove from heat; cool to room temperature. Stir in brown sugar and vanilla. Add eggs, mix well. In bowl, sift together flour, baking powder and salt. Slowly fold in flour mixture; mix well. Stir in chips and walnut pieces.
 Pour batter into pan and sprinkle walnut pieces on top of batter. Bake for 25-30 minutes, or until a tester comes out clean.
April 16, 2012
Greek Yogurt Parfait
After a hard work out, I'm usually tired and hungry. If I'm being good that day, I'll grab some fruit, but sometimes I stray and have something that's a little sweet and not so healthy.


This morning I decided to opt for something healthy and came up with a Vanilla Greek Yogurt parfait with granola, organic blueberries and fresh mango. YUM!
Greek Yogurt Parfait

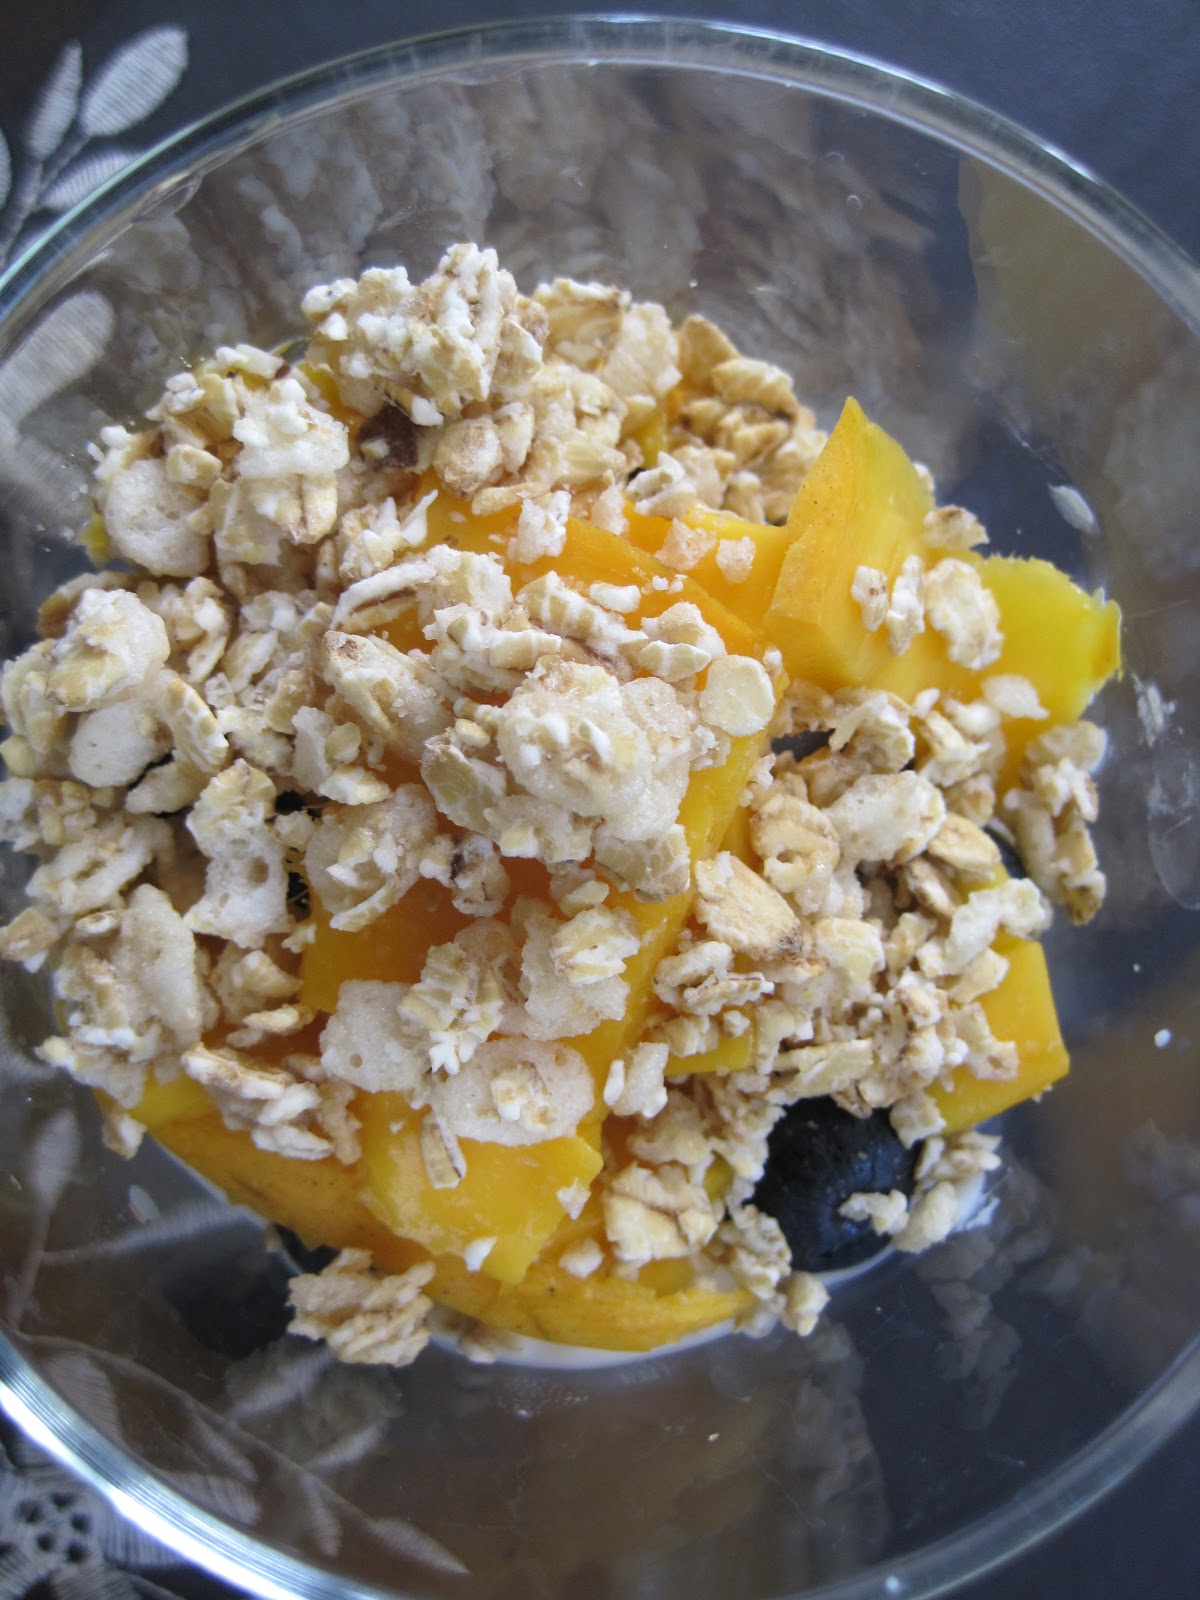
1 small container (single serving) low fat Vanilla Greek Yogurt
2 tbsp granola
20 organic blueberries, washed
1/2 Alphonso mango, peeled and diced
In a glass, fill the bottom with half of the yogurt. Put half of the blueberries and mango pieces on top of the yogurt. Do another layer of yogurt, berries and mango and end with the granola.
April 10, 2012
Totally unrelated to the kitchen
I'm back. From where you ask? No where.
 So now that I'm uninspired with my cooking, I thought I would blog about something totally unrelated to my kitchen- a reading challenge! I signed myself up for the Dystopian Challange 2012 and I'm aiming for the Contagion level. That means I have to read 15 Dystopian novels this year. I've already read one, Divergent by Veronica Roth...just 14 more to go. I know of two other books that I want to read with the same themes: The Handmaid's Tale by Margaret Atwood and Insurgent by Veronica Roth. The rest of the books I will pick up as a I go along. If I'm stuck, there are plenty of Dystopian novel lists out there to guide me.
I've hit a slump in the cooking department. I haven't been creating anything new nor have I tried out any recipes. I'm just cooking the same stuff and those recipes are already listed. I do have a few drafts for some recipes, but I'm either been too lazy to blog or I've left the recipe in TO when I'm in LA and vice versa.
So now that I'm uninspired with my cooking, I thought I would blog about something totally unrelated to my kitchen- a reading challenge! I signed myself up for the Dystopian Challange 2012 and I'm aiming for the Contagion level. That means I have to read 15 Dystopian novels this year. I've already read one, Divergent by Veronica Roth...just 14 more to go. I know of two other books that I want to read with the same themes: The Handmaid's Tale by Margaret Atwood and Insurgent by Veronica Roth. The rest of the books I will pick up as a I go along. If I'm stuck, there are plenty of Dystopian novel lists out there to guide me.March 20, 2012
Rice
Rice. Such a simple and straightforward title, right? Well I really wanted to name this post "Browned Aged White Basmati Rice with Frozen Mixed Vegetables," but I'm sure you can see why I didn't. Too long and wayyyyy too confusing! So I stuck with Rice. Just Rice.
White rice (not the Uncle Ben's variety thank you very much!) is a staple in many Asian households. Curries, pakoras, stews, and fish are usually accompanied with a heaping plate of steamy, fluffy Basmati rice. The rice can be plain white, or seasoned with spices; vegetables like potatoes, peas or beans like chick peas.
In my house, we don't measure out dry rice using a dry measuring cup. Rather, we use a small mug that is used for coffee or tea like this. One small mug full is equivalent to 1 cup. And when it comes to cooking the rice, the amount of water used is double the amount of dry rice measured out. For example, if you measured out 1 cup of rice using the small mug, you will use the same mug and fill it twice- 2 cups of water. Kinda confusing at first, but very easy to implement.

Browned Aged White Basmati Rice with Frozen Mixed Vegetables

1.5 cups (using a small mug for measurement) dry white basmati rice
3 cups of water (using a small mug for measurement)
1 large onion, thinly sliced
2 Tbsp oil (olive or canola)
1 1/2 tsp salt
1 medium-sized cinnamon stick
10 whole black peppercorns
4 cloves
1/4-1/2 tsp black cumin seeds
1/4-1/2 cup (regular measure) frozen mixed vegetables or peas
Put rice into a large bowl and wash thoroughly until water runs clear. Fill pot with water until rice is covered and set aside for 30 minutes.
Put the sliced onions and olive oil in a large pot and brown onions until dark brown. While browning onions, add in cinnamon stick, peppercorns, cloves and cumin seeds.
After onions are ready, add 3 cups of water and salt and bring to a boil.
Drain water from rice and add rice to boiling water. Lower heat to medium and cook rice (while stirring occasionally) until almost all of water has been absorbed. Add the frozen vegetables, lower heat to lowest heat point and cover pot with its lid. Let rice and vegetables steam until desired consistency has been reached.
January 31, 2012
Pear and Ginger Smoothie
We're almost into February and there's hardly any snow on the ground! What is wrong with this picture? Where are the scarves, mitts, shovels, heaps of snow, slush and salt machines? One of the benefits, (I thought), of being in TO in the winter while hubby is travelling on business would be that I get to have my snow fix. But it seems like God has other plans! The weather is completely wonky- freezing one day with wind chills in the double digits, the next day it's a balmy 5 degrees Celsius. No wonder people are getting sick!
To help me get through this very weird patch of winter weather we're experiencing, I decided to make a pear and ginger smoothie, courtesy of Guilty Kitchen. I tweaked the recipe just a tad to suit my needs.

1 Bosc pear, peeled, cored and chopped into small pieces
juice of 1/4 a lime
a tiny nob of fresh ginger, peeled and grated (you know those tiny nobs that grow off the body of ginger? well that's what I used)
2 tbsp honey flavoured 0% Greek yogurt
1/2 tsp vanilla bean paste
1/2 cup 2% milk
To help me get through this very weird patch of winter weather we're experiencing, I decided to make a pear and ginger smoothie, courtesy of Guilty Kitchen. I tweaked the recipe just a tad to suit my needs.
Pear and Ginger Smoothie

1 Bosc pear, peeled, cored and chopped into small pieces
juice of 1/4 a lime
a tiny nob of fresh ginger, peeled and grated (you know those tiny nobs that grow off the body of ginger? well that's what I used)
2 tbsp honey flavoured 0% Greek yogurt
1/2 tsp vanilla bean paste
1/2 cup 2% milk
Put all ingredients into a blender and mix until smooth.
January 13, 2012
Cinnamon-Sugar Palmiers
For years, I've been eating palmiers, (sometimes referred to as elephant ears, french hearts, or glasses). My grandmother and grandfather were fans of the cookies/pastries and we always used to have them readily available in the kitchen. They were great on their own, or could be dunked into a cup of chai or hot chocolate.


I never thought I'd try my hand at making palmiers, because they looked so complicated with all of their beautiful, swirly layers. However, I have Martha Stewart to thank for making, what seemed like a daunting task, so simple and effortless. Martha came onto the Today show in December and showed how to make some holiday sweets. Once I saw her show Al Roker how to make the palmiers, I knew I had to go and make them myself.
I tweaked the recipe to reduce the amount of sugar from 1 cup to 1/4 cup and I cut out the chocolate. Also, the only difference that I noted between regular palmiers and Martha's palmiers is that regular palmiers are rolled so that the pastry rolls meet each other, while Martha's rolls the pastry so that they form an "S" shape.
Cinnamon-Sugar Palmiers

1 package pre-rolled puff pastry
1/4 cup sugar
1 tsp cinnamon
Preheat the oven to 375 degrees.
In a small bowl, mix together the sugar and cinnamon and set aside.
Unwrap one sheet of pre-rolled puff pastry and loosen pastry from paper. Sprinkle half of the cinnamon-sugar mixture onto half of the puff pastry.

Begin to fold the dough towards the centre in small increments until you reach the halfway point (no more sugar).

Gently flip the dough over and repeat the same process again- sprinkle cinnamon-sugar over the pastry and being to roll the dough to the rolled half (it's okay if one roll is bigger than the other). Repeat same process with second puff pastry sheet.


Wrap the dough rolls in plastic wrap and chill for 20-30 minutes in the fridge. Cut the ends off until you are left with even edges. Cut the dough lengthwise int 1/2" or 1" pieces and lay them 2" apart on a parchment-lined cookie sheet.
Bake cookies until underside is a deep golden brown colour. Using a metal spatula, flip cookies over and bake for another 5 minutes. Transfer cookies to cooling rack. Store in an airtight container for 1-2 days.
January 5, 2012
Happy New Year! Plus some Lemon Pepper Chicken
Happy New Year everyone!
When I look back, it seems as though 2011 went by in a flash. I can think back to some key things that I did, saw, and participated in and I hope to do some of those things again in 2012. Here's to hoping for a safe and healthy 2012 filled with lots of adventure, lots of learning, and lots of time spent with those whom I love.
This recipe that I'm going to share with you tonight has been a long time coming. I've made it several times (great reviews from family members!) and have been wanting to share it with you for a really long time. The reason for it not appearing sooner? Well, I've been lazy. :o)
 I was inspired by a Barefoot Contessa episode where Ina Garten made lemon-pepper chicken breasts. I took some of her ideas, changed them around a bit and came up with my own version using a whole chicken. This is super simple and is great on a weeknight (it only takes about 1.5 hours to bake if the chicken has been prepared beforehand) or the weekend. What I do is buy one or two whole chickens and clean them up, then marinate them with the ingredients in the recipe. I then wrap them up in freezer bags and put them in the freezer for a day when I don't want to spend too much time in the kitchen. Add the chicken to a roasting pan filled with vegetables or small potatoes and bake for 1.5-2 hours and you have a healthy meal on your hands.
Lemon-Pepper Chicken

1 whole skinless chicken, cleaned, washed and pat dried with paper towel
juice of 2 lemons
zest of 2 lemons
4 lemon halves (use the left over lemons)
2 tbsp + 1 pinch dried dill
2 jalapeno peppers, sliced lengthwise with seeds intact
2 tbsp freshly minced garlic
2 tbsp freshly minced ginger
2 tbsp + 1/2 tsp salt
Place the chicken on a flat surface and take the minced ginger and garlic and rub them all over and inside the chicken. Take care to get in between the joints. Take 1/2 tsp salt and a pinch of dried dill and rub them on the inside of the chicken. Take 1 tbsp of salt and rub it over one side of the chicken and repeat on the other side. Pour juice of two lemons over both sides of the chicken. Take the remaining dill and spread it evenly over both sides of the chicken. Take the 4 lemon halves and jalapeno peppers and stuff them into the chicken's cavity. Sprinkle lemon zest over the top of the chicken (breast-side down). At this point you can stick the chicken and any juices into a freezer bag and put into the freezer. If you want to roast it the same day, let it marinate in the fridge for a couple of hours.
Roasting chicken

Preheat oven to 375 degrees.
Place marinated or thawed chicken, and any juices in a roasting pan. If any lemons escaped, stick them back into chicken cavity. Cover roasting pan with lid and place in the lower half of oven. Check chicken after 30 minutes. If chicken juices and lemon juices have been released, begin to baste chicken with them. Repeat every 30-40 minutes until chicken is done (about 1.5 hours although I usually check by poking at the leg joints to see if everything is cooked). Remove chicken from oven and set aside for 5-10 minutes. Remove lid and baste chicken with juices again before cutting it into pieces. Repeat basting again before serving.
December 14, 2011
How to: Brown Onions
Carrots, onions and celery are the base if you want to make soup. Browned onions are the base if you want to make a curry. Some people brown the onions just before they start to make their curry, others (like myself) tend to make a large amount of the base beforehand and freeze it in small packs. I'm always looking to save time in the kitchen and by having the onions pre-cooked shaves 20 minutes off of my cooking time. Also, by making the onions in big batches beforehand, I reduce the amount of onion stink in the house..BONUS!
I remember as a kid, my mom would gather the troops, meaning me, my sister, and my grandmother, and we would sit at the kitchen table and peel and chop 50 lbs of onions. My dad would then hook up the gas stove in the garage and my mom would cook the onions in a HUGE pot over the fire. Once the onions reached the right texture and colour, the onions were cooled, blended in the food processor and then put into neat packs and stocked in the freezer. Those onions would usually last about 3 months and then we'd have to start the whole process over again.
Now I'm not crazy to handle 50 lbs of onions all by myself! I stick with 6 lbs-10 lbs at a time, use 2.5 hours making/watching/stirring the onions and then the rest of the day is spent airing out my home!
6 lbs yellow onions, peeled and chopped
1 cup olive oil ( I know that sounds like a lot, but I generally don't add anymore oil to my dishes because the onions have enough to help with the cooking process)
Pre-heat oven to 450 degrees.
In a large roasting pan, mix together the onions and oil. Cover the roasting pan and place it on the lower rack of the oven. Every 20-30 minutes give the onions a good stir. After about 2-2.5 hours, the onions should be a rich brown colour and the quantity reduced by half.
Cool the onions down for 20 minutes. In a food processor, blend the onions to a somewhat chunky paste. Scoop out the paste into small freezer friendly dishes to stock in your freezer.
When you're going to make your curry, you'll want to take out a dish of browned onions 5-6 hours in advance and let it defrost on the counter.
My Measurement notes: 1-2 heaping tablespoons onion paste = 1 uncooked onion
I remember as a kid, my mom would gather the troops, meaning me, my sister, and my grandmother, and we would sit at the kitchen table and peel and chop 50 lbs of onions. My dad would then hook up the gas stove in the garage and my mom would cook the onions in a HUGE pot over the fire. Once the onions reached the right texture and colour, the onions were cooled, blended in the food processor and then put into neat packs and stocked in the freezer. Those onions would usually last about 3 months and then we'd have to start the whole process over again.
Now I'm not crazy to handle 50 lbs of onions all by myself! I stick with 6 lbs-10 lbs at a time, use 2.5 hours making/watching/stirring the onions and then the rest of the day is spent airing out my home!
Browned Onions
 |
| Browned onions |
6 lbs yellow onions, peeled and chopped
1 cup olive oil ( I know that sounds like a lot, but I generally don't add anymore oil to my dishes because the onions have enough to help with the cooking process)
 |
| 6 lbs of onions BEFORE cooking |
In a large roasting pan, mix together the onions and oil. Cover the roasting pan and place it on the lower rack of the oven. Every 20-30 minutes give the onions a good stir. After about 2-2.5 hours, the onions should be a rich brown colour and the quantity reduced by half.
Cool the onions down for 20 minutes. In a food processor, blend the onions to a somewhat chunky paste. Scoop out the paste into small freezer friendly dishes to stock in your freezer.
When you're going to make your curry, you'll want to take out a dish of browned onions 5-6 hours in advance and let it defrost on the counter.
My Measurement notes: 1-2 heaping tablespoons onion paste = 1 uncooked onion
December 10, 2011
'Tis the season to get sick
With the stresses of daily life and the change in weather, people are starting to fall sick with the cold and flu. I've been stuck with this "light" cold for a while now. It started off as a runny nose and some sneezing and then slowly progressed into a thick feeling in the throat. For a few days I had a raspy, hoarse voice and then it went away, but I have a feeling that it is on its way back for another visit.
My mom gave me a recipe that was passed along to her by an aunt of mine. It's a mixture of hot water with fresh lemon, honey and cinnamon. It's supposed to help boost your immune system and combat colds (**do remember that if you are sick, you should go and visit your doctor and seek his/her advice**). Because I was so miserable, I thought I'd give it a whirl and I think it's what gave me my voice back.
I played around with the ingredient proportions until I found something I liked. You can change the proportions very easily if you want a stronger or milder flavour.

1 cup boiling hot water
1/2 or 1 slice of fresh lemon
1/8 tsp ground cinnamon
1 tsp honey
Boil water as you would for tea. Put the lemon, cinnamon and honey in a heat-proof cup. Pour hot water into the cup and give it a stir. Snuggle up in bead with a good book and drink away!
A note: If I make a second cup for myself, I use the same lemon slice and just add the cinnamon and honey.
My mom gave me a recipe that was passed along to her by an aunt of mine. It's a mixture of hot water with fresh lemon, honey and cinnamon. It's supposed to help boost your immune system and combat colds (**do remember that if you are sick, you should go and visit your doctor and seek his/her advice**). Because I was so miserable, I thought I'd give it a whirl and I think it's what gave me my voice back.
I played around with the ingredient proportions until I found something I liked. You can change the proportions very easily if you want a stronger or milder flavour.
Hot Lemon Water with Cinnamon and Honey

1 cup boiling hot water
1/2 or 1 slice of fresh lemon
1/8 tsp ground cinnamon
1 tsp honey
Boil water as you would for tea. Put the lemon, cinnamon and honey in a heat-proof cup. Pour hot water into the cup and give it a stir. Snuggle up in bead with a good book and drink away!
A note: If I make a second cup for myself, I use the same lemon slice and just add the cinnamon and honey.
November 29, 2011
Eid Treats # 2: Coconut Macaroons
I don't know about you, but I have some recipes that cannot be shared here on the blog. They are so top secret, that only a few pairs of eyes have ever witnessed their birth in my kitchen. People have asked me for the recipes and I have to politely decline. It's not that I purposely want to be mean; it's just that some of them are my special signature desserts and I want to keep them close. If I passed out the recipes to every person on the street, that "special-ness" would dissipate.
I'm not the only one who feels this way. Many friends and family that I know like to keep one or two recipes secret. There are even bloggers out there who openly admit that they will not share everything with their readers. One such blogger is Gesine from Confections of a (Closet) Master Baker. I came across her blog after reading her book "My Life From Scratch." Gesine works magic in her kitchen and spices up her blog entries with snarky, in your face commentary that will keep you on your toes and coming back for more.
Getting back to recipe protection, Gesine made a name for herself by baking up delicious French Macarons. On her blog, she notes that a guy named Gary e-mailed her and asked her for the recipe. Did he HONESTLY think she would give him the recipe that gave her her livelihood? DUH! Instead, she gave him a coconut macaroon recipe to try. I ran with it and tweaked it ever so slightly (instead of vanilla extract, I used vanilla bean paste so there were millions of tiny vanilla bean specks running throughout the macaroons). The next time I make these babies, I'd probably cut down on the sugar or used unsweetened coconut and let them brown up just a tad more.
Coconut Macaroons
 |
| Scooped macaroons ready to go into the oven |
4 egg whites
3 1/2 cups sweetened shredded coconut
3/4 cup sugar
1 tsp vanilla bean paste
1/2 tsp salt
Preheat oven to 300 degrees.

Combine all ingredients into a heatproof glass or metal bowl and set atop a pot of simmering water (about 1-2 inches of water in the pot).
Make sure the bottom of the bowl does not come into contact with the simmer water. Stir the mixture occasionally, ensuring to scrape the bottom of the bowl, to prevent ingredients from burning.
After approximately 10 minutes, the mixture should be hot and slightly thickened.
With a medium or large cookie scoop, drop batter onto a parchment-lined cookie sheet and bake for 15-20 minutes until edges are golden brown.
Cool for a few minutes on the cookie sheet, than remove using a offset spatula to a cooling rack.
**UPDATE DECEMBER 6, 2011
I asked Gesine the best way to store the macaroons so they don't dry out. They last for one day outside, but if you find yourself not eating all of them at once, put them in the freezer. When you are ready to eat them, thaw them out and warm them in the oven. The macaroons will last for a little bit less than a month if stored properly in the freezer.
-
Subscribe to:
Posts (Atom)